High Sierra Problems: How To Fix The Most Common MacOS Issues

The excitement of installing a new version of macOS, especially if it’s a High Sierra 10.13, is only tempered by the possibility of it not working properly or not being compatible with the apps you use most.
Before you begin upgrade to MacOS make a bootable backup
If you haven’t started the process of upgrading yet, check if the Mac is compatible with macOS High Sierra and make a bootable backup.
Do it now, before you do anything else. If things go disastrously wrong at least you’ll be able to boot from macOS’ Recovery partition and migrate all your data back to your Mac. You can use any backup tool you like – Apple obviously favours Time Machine, but you don’t have to use it. You can use, for example, Get Backup Pro, which comes with your Setapp subscription. Don’t have a Setapp subscription? Click here to sign up.
Common MacOS High Sierra Problems
While most new versions of macOS are relatively problem-free, it’s not unknown for users to have issues – particularly with a beta or .0 release. Thankfully most are easy to resolve. Here’s how to fix the most common High Sierra issues.
High Sierra Installer Won’t Download
If you’re trying to download the macOS High Sierra installer, you’ll need to have signed up to App Store. If you’ve done that, and managed to start the downloading process only for it to fail, force quit the App Store app.
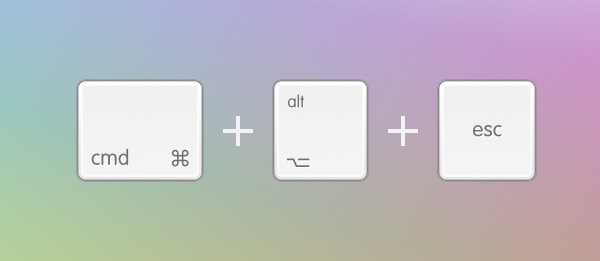
- Press Cmd-Alt-Esc or go to the Apple menu and choose Force Quit.
- Select the App Store app and confirm you want to force quit.
- Re-launch the App Store and try downloading again.
Macos High Sierra Won’t Install
If the download completes successfully but the installation doesn’t finish, force quit the installer using the same procedure as above.
- Restart your Mac
- Launch the App Store app and go to the Purchases tab.
- Find macOS High Sierra and click Install.
If that doesn’t work, try deleting the downloaded installer (it’s in your Applications folder) using CleanMyMac and download it again.
If you have a copy of macOS Server in your applications folder, that may be the root of the problem. Delete it and try again.
Getting The Rainbow Wheel Every Few Seconds After Upgrade
Check console.app and if you’re getting errors from sandboxd and hidd (IOKit), your problem is a third party software. It’s probably because it wasn’t supported by the new APFS file system. It tries to repeatedly update causing your Mac laptop to be stuck in an endless loop. To fix this issue, just find and remove this app and everything will be fine.
What If MacOS High Sierra Stops Responding?
If your Mac hangs and you can’t do anything at all, wait up to half an hour to see if that helps. If not, force your Mac to restart by holding down the power button and waiting for it to shutdown and then start again.
MacOS 10.13 High Sierra Keeps Logging Out
In case you’re getting tired of you new OS kicking you out of your account on random occasions, there’s a chance it’s pretty easy to turn it off. For instance, there is a setting in your Security & Privacy menu that is responsible for that.
- Go to Security & Privacy > Advanced and find the box saying “Log out after… minutes of inactivity.”
- Uncheck it.
You can go even further and turn off the need to enter your password every time you open your Mac or turn it on. In the same Security menu find General settings and uncheck another box, the one saying “Require password after sleep or screen saver begins.” As you can tell, though, that it not the most secure option, especially if it’s your work computer or if you can expect other people getting a hold of it.
If the problem occurs when you’re using Chrome browser, disable the hardware acceleration feature: look for Advanced menu in its settings and turn off hardware acceleration.
How To Fix Usb Devices Not Recognized On High Sierra
It’s not a nice thing to find out after getting a brand new system, but some Macs have been struggling with USB devices after the upgrade. If your Mac is one of them and refuses to see or read USB drives, external drives, and so on, try resetting SMC.
We’ve explained earlier in the article how to do it, but here’s brief instruction. For all laptop Macs like MacBook, MacBook Pro, and Air, simply turn it off and then on again, while holding Shift + Control + Option and the Power button for 10 seconds.
For iMac, Mac mini, Mac Pro, and Xserve, You start my turning off your Mac and then unplug the power cord. Chill for about 15 seconds. Look out of the window or something. Plug the cord back in, wait a couple of seconds and turn your Mac on.
If the problem remains, you can try to reinstall High Sierra or consult with customer support at Apple.
Security Issues In High Sierra: Password Stealing
The only known and relatively famous security issue with the latest macOS is the password stealing code created by security researcher Patrick Wardle. Long story short, he showed that if he wanted to (and you allowed him by installing his malicious code on your Mac), he could extract your passwords from Keychain without having your master password for the system.
If you look into it, it all boils down to “Don’t get into white vans with strangers and don’t install suspicious software from shady developers on your Mac.” Basic safety precautions. Make sure you visit the developer’s website, make sure you install signed apps from trusted sources. That’s about it.
To check your safety settings, go to System Preferences > Security & Privacy > General and see if ‘App Store and Identified’ developers is selected.

Meanwhile, Apple is reportedly working hard on patching up the breach.
How To Fix Mac Running Slow On MacOS High Sierra
In case you’ve just upgraded to the new macOS and your Mac runs slower than it used to, worry not. It’s common and it’s not exactly an issue. The thing is that your Mac is reindexing a bunch of files while running a new system and it slows down its productivity and performance.
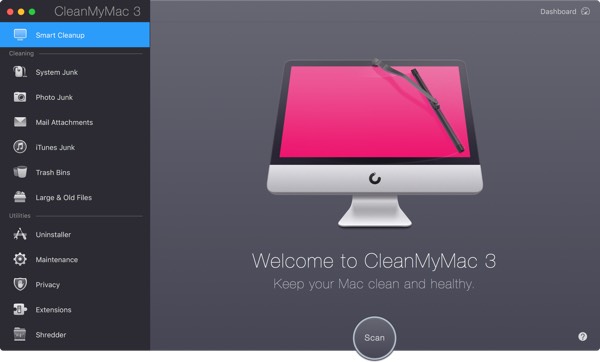
For 12-24 hours your Mac could experience these trouble and they are still within the range of normal behavior. If your Mac is running slow a few days after the upgrade, try some Mac-optimizing utilities to fix it. For instance, there is an app called CleanMyMac that can remove system junk and speed up your Mac. It’s a Mac cleaner with a set of handy utilities, some of which might come in handy.
For instance, one of the reasons for your Mac slowing down could be that some apps hog too much RAM. To see if this is the problem, try opening Activity Monitor and see which apps take to much processing power. If some of them seem to be exceedingly greedy and you’re pretty sure that’s not how it’s supposed to be, you can reset them.
To fix RAM-consuming apps, use the special module in the CleanMyMac app that we mentioned earlier, Uninstaller. Simply open CleanMyMac, go to Uninstaller, find the app in question and click Reset. The app will then lose its preferences and stored info and roll back to default settings. It’s basically like reinstalling it but without the hassle.
If your Mac goes all the way and becomes completely unresponsive or even needs rebooting, follow the instruction in our guide on how to speed up a slow Mac after installing macOS.
Fix Problems With Apps Compability
With every macOS upgrade there are older versions of apps that are no longer supported by their developers. One casualty of High Sierra is Microsoft Office 2011 for Mac. Microsoft has said that it will not offer support for it running on new macOS and it’s likely you’ll have problems with it. The only solution is to upgrade to Office 2016.
For other apps, upgrade them and check the developer’s website for details of High Sierra support. Even if an app doesn’t work with the new version of the new OS, it’s possible its developer is still working on support and it will work by the time macOS ships.
If you want to delete an app – perhaps because you’ve replaced it with a newer version – use CleanMyMac Uninstaller to make sure you delete all the files associated with the app.
Display Issues On High Sierra
A few things can go wrong with your Mac’s display after the upgrade, so let’s see what can be done when they occur. You might experience troubles waking your Mac from sleep, when the display just never comes live or it does, but minutes after you’ve jammed every key on the keyboard.
Then you might also experience flickering of certain images while browsing the web. The last issue is a grey screen or a blue screen that signal something going pretty wrong with the whole Mac-to-display connection.
What you need to do to fix it is resetting your NVRAM. It’s that kind of memory that unlike regular RAM is non-volitile which means it keeps info when your Mac is turned off. That’s why simply turning it off and on again won’t help. Anyway, it’s a quick fix.
- Turn your Mac off and when you turn it back on, hold Command+Option+P+R while it’s booting. You will either see your screen blink twice or hear a two chimes.
- After that you need to have your System Management Controller reset also.
- Turn your Mac off again and press and hold Shift + Control + Option and the Power button for 10-15 seconds.
That should do it.
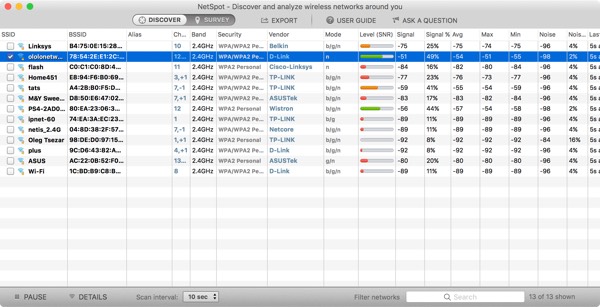
Fix Wi-Fi Problems
One of the issues that has been reported the macOS High Sierra is with wifi signals. To analyse your wifi network after installation, use WiFi Explorer or NetSpot, both available in Setapp. Both these tools map the wifi networks within range of your Mac and identify areas where signals are either strong or weak. By using one of these apps, you should be able to tell if your Mac is having wifi problems.
If you can’t identify a problem and can’t connect to a network, try switching wifi off in the Finder menu bar, waiting 30 seconds and switching it back on again.
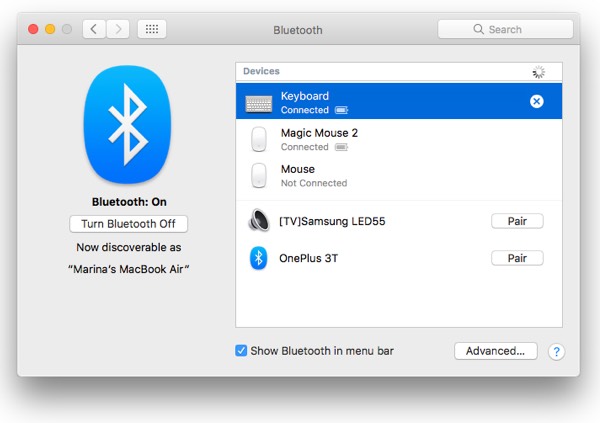
Bluetooth Issues On MacOS 10.13
Not much has been reported about Bluetooth issues on macOS High Sierra at the moment. However, there’s always one infallible piece of advice to give: re-pair your device. Find the Bluetooth icon in the upper right corner and open its preferences. If you can’t see it there, go to System Preferences and find Bluetooth menu.
Hover on the device in question and click the X-mark next to it. This not just disconnects the device, but removes it entirely from the list until you pair it back. To restore the device, set it into the painting mode and when it shows up in the list below, click “Pair.”
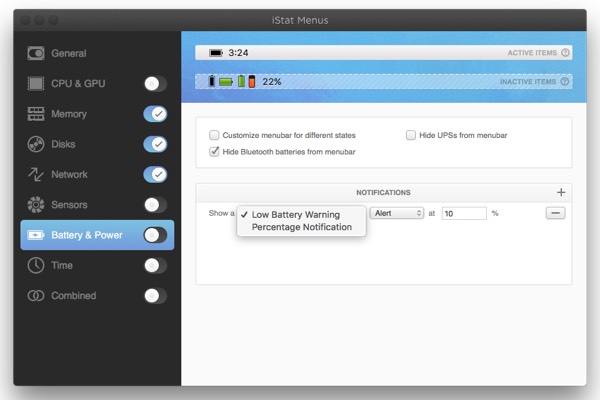
Macos High Sierra Battery Problems
Ramping up performance and adding new features while avoiding putting more strain on a battery is tough. So don’t be surprised if your Mac’s battery (if it’s a laptop) doesn’t last as long after upgrading. Use iStat Menus, available in Setapp, to monitor battery life – as well as CPU usage, fan speeds, temperatures and a host of other data. That way you’ll be able to tell if your battery really is performing less well after upgrading.
Your Mac use more power when it’s processor is under stress – partly because it generates heat which needs fans to cool it. So quit any apps that are hogging processor cycles if you’re not using them. You should also update apps to their most recent versions, and could turn down your screen’s brightness and move somewhere cooler if you’re sitting somewhere that’s particularly hot.
If your Mac’s battery hasn’t been its best self since the upgrade, try checking where the problem is. Open Activity Monitor > Energy and see which apps take up the most. Browsers and rendering software is expected to be energy-heavy, so that’s normal.
But if you’re seeing some minor applications you rarely use taking up a chunk, consider uninstalling them. You can use the specially-made Uninstaller in an app called CleanMyMac for the job, because just dragging an app to the trash doesn’t uninstall it fully.
No Mail Notifications In MacOS High Sierra
In case you either see mail notification for less then a second or don’t see it at all, there might be a problem with settings. Try checking if you have the notifications turned on in System Preferences > Notifications. Does you alert style say “Banner”? If it does but the problem remains, change the alert style from ‘Banner’ to ‘Alert’ or ‘None’. After that you can switch it to ‘Banner’ again and from now on it should work fine.
APFS Compatibility Issue With Games And Unity Engine
This part is for gamers only. If any of these names ring a bell for you, don’t rush to upgrade: « Cities: Skylines », « Civilization V », « Team Fortress 2, » « Half-Life 2, » and « Counter-Strike: Global Offensive. »
Developers of these games and of the Unity engine, joined by threads on Reddit and Steam, have all voiced concerns about the APFS system and its compatibility with the main game engine and graphic controls. So, before you upgrade, hit Reddit or Google and find out if these troubles have been resolved.
If All Else Fails
If a force restart doesn’t work and you can’t get your Mac to run the new OS at all, the next step is to try repairing the disk on which it’s installed.
- Restart your Mac while holding downs cmd+R to boot in recovery mode.
- When it’s booted, choose Disk Utilities from the macOS Utilities menu.
- Click Repair Disk to to fix any problems on the disk.
- When it’s done, restart your Mac normally.
If that doesn’t work, you’ll need to reinstall macOS.
- Plug in the hard drive on which you made the bootable backup and select it as your Mac’s Startup Disk in System Preferences.
- Re-boot while holding down cmd+R.
- When the macOS Utilities menu appears, choose Disk Utilities and use it to erase you Mac’s main drive.
When it’s done, choose Reinstall macOS and select your Mac’s main drive as the destination. Wait for High Sierra to install and restart. When you see the Setup Assistant, choose the option to migrate data from another disk and choose the external disk as the source.