Block WordPress xmlprc.php DDOS attacks using Fail2Ban

Few days ago, my friend’s WordPress website went down. After investigation, I have figured out that it was receiving massive amount of posts requests to the xmlrpc.php file, which brings the apache and mysql to eat up all the system resources and the website crashed. Fortunately, I have figured out the way to mitigate this attack using Fail2Ban, which I’ll share in this post.
Install the Fail2Ban package using the following command:
apt-get install fail2ban iptables
 Make a local copy of jail.conf file for configuration change:
cp /etc/fail2ban/jail.conf /etc/fail2ban/jail.local
![]()
![]()
Open up the jail.local configuration file:
vi /etc/fail2ban/jail.local
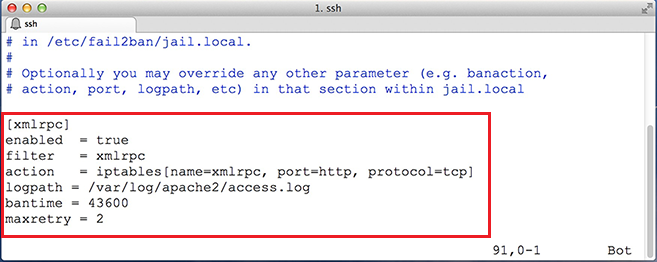
 Add the following lines at the end (Change the logpath to match with yours):
[xmlrpc]
enabled = true
filter = xmlrpc
action = iptables[name=xmlrpc, port=http, protocol=tcp]
logpath = /var/log/apache2/access.log
bantime = 43600
maxretry = 2
 Move to the Fail2Ban’s filter directory:
cd /etc/fail2ban/filter.d/
 Here we need to create the filter to trigger an action with iptables:
vi xmlrpc.conf
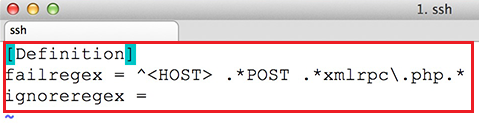
 Add the following lines:
[Definition]
failregex = ^<HOST> .*POST .*xmlrpc\.php.*
ignoreregex =
 Restart the Fail2Ban service:
service fail2ban restart
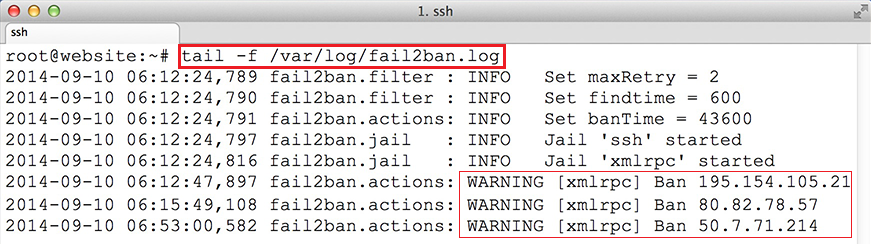
 Check the Fail2Ban log and there you will find that it start banning the IP address if everything went well:
tail -f /var/log/fail2ban.log
 Hope this will help you!
Please Remember me in your prayers!
Source: Lazy Geek