Simple Tor Setup on Mac OS X

Source: kremalicious.com – Matthias Kretschmann
There’re many reasons you might want to browse anonymously which can be accomplished by using Tor. The setup instructions on Tor’s website are quite scattered and outdated so here’re some steps to setup Tor on OS X with a simple automated script at the end.
I’m using OS X Yosemite (10.10) for the following instructions but it should work on almost any OS X version.
Tor Browser
The most simple way to surf anonymously with Tor is to just grab the Tor Browser bundle.
But it’s based on a super old version of Firefox. And there might be more you want to do anonymously on your machine than just browsing the web, like accessing resources via the Terminal or any other app. Or just use the browser you’re used to.
For this you need to have Tor installed on your system and additionally set specific Proxy values in your network preferences after you’ve started Tor.
Install Tor
Contrary to the weirdly outdated install instructions on Tor’s website (hey, remember Macports?), installing Tor on Mac OS X is super simple with Homebrew.
In your Terminal execute:
brew install tor
Then you can start it up by running:
tor
Congratulations, you now have Tor running on your system. But none of your network traffic is routed through it yet.
In order for all your system traffic being routed through Tor you need to adjust your system’s network proxy settings whih you can either do visually in the System Preferences or programmatically via OS X’s builtin networksetup.
Set network proxy settings via System Preferences
You can do this under System Preferences > Network and creating a specific Tor network location for it:
- From Location dropdown at the top, select Edit Locations…
- Create a new location by hitting the plus button and name it Tor. Hitting Done will select the new location which is now ready to be configured
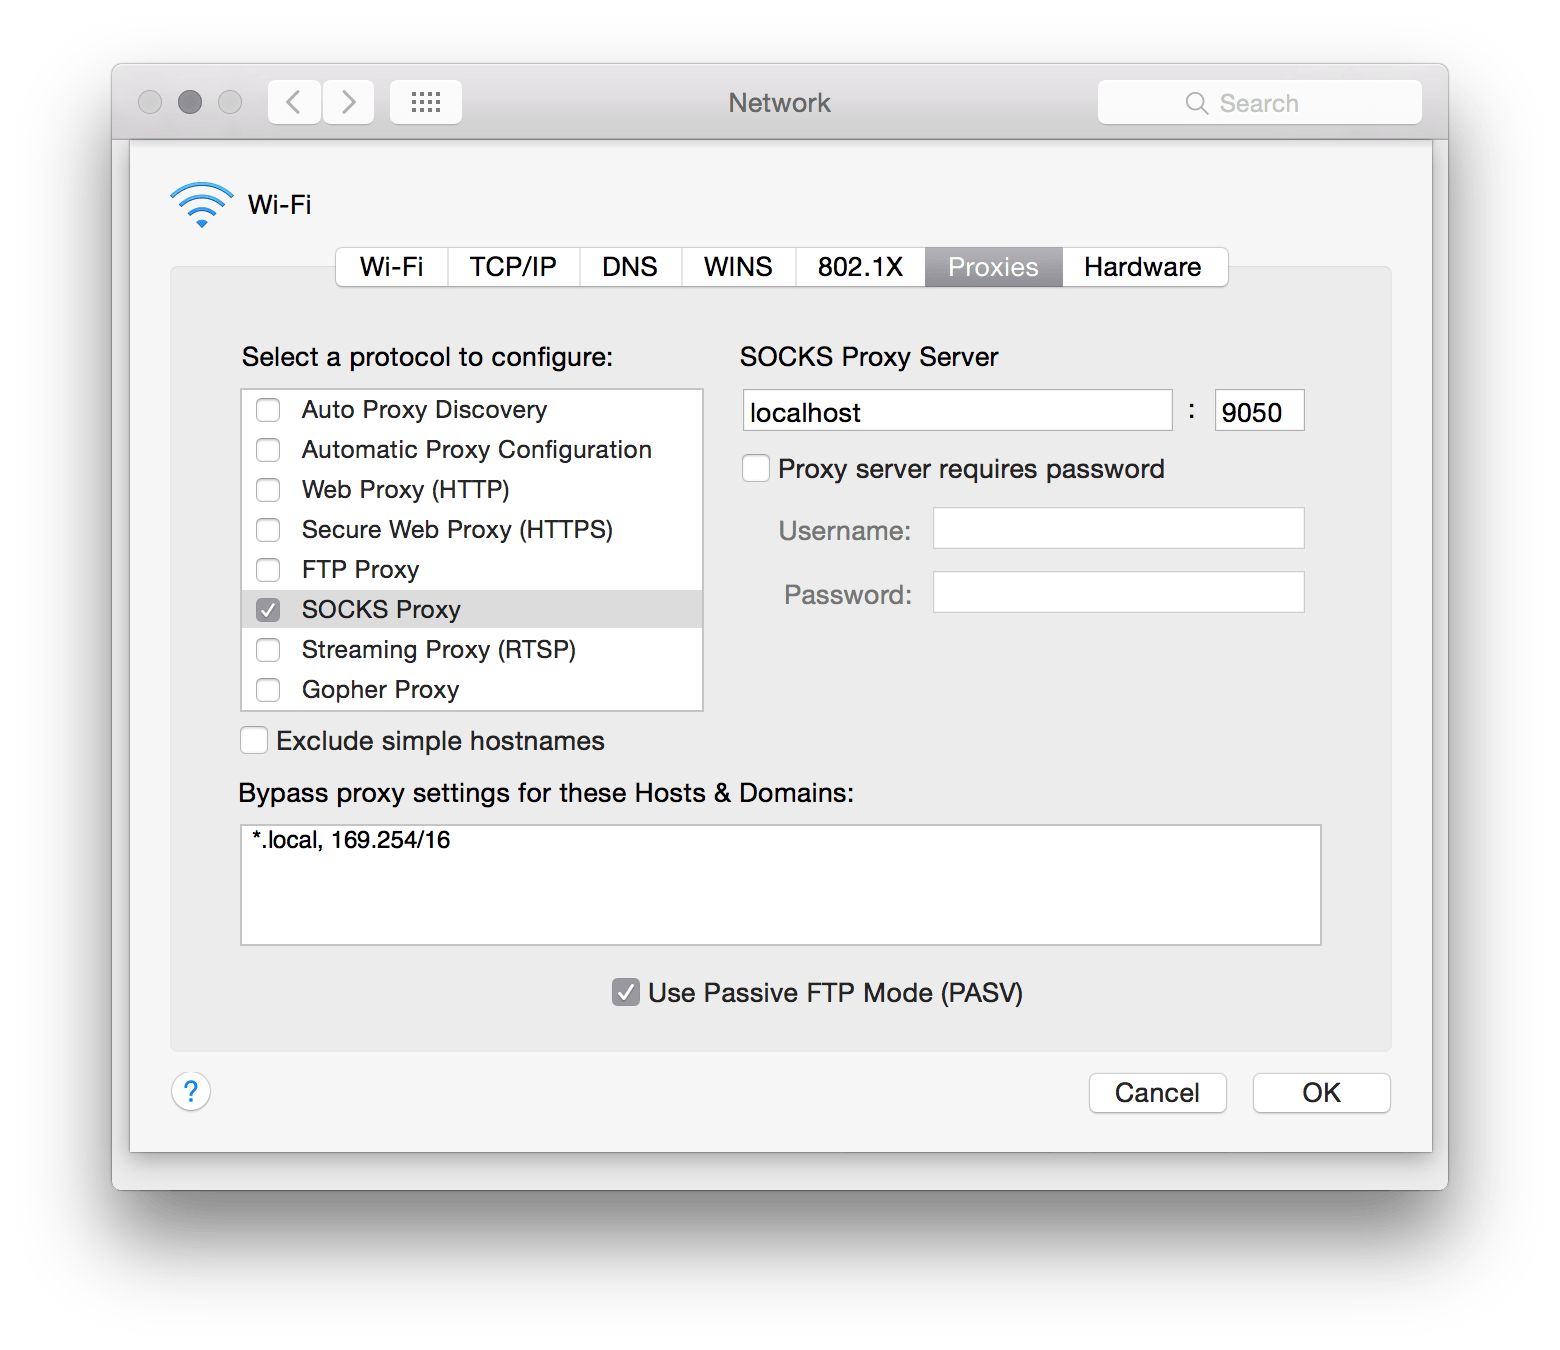
- Go to Advanced > Proxies and activate SOCKS Proxy and add those values:
- SOCKS proxy server:
localhost - Port:
9050
After hitting OK & Apply at the initial network screen, you can easily switch to this newly created location from your menu bar under > Location whenever you start up Tor.
Switching to the Tor location routes all network traffic on your system through Tor. Note that you have to repeat those steps for every other network interface if you use, say, Wi-Fi and Ethernet interchangeably.
All in one go: start Tor & set network proxy settings automatically
When you’re already in the Terminal to start up Tor, additionally setting the network settings invloves a lot of fiddling around. Ain’t nobody got time for that.
Thankfully OS X provides a way to programmatically set those proxy values via the networksetup utility. I’ve found a nice script for this but running it opened multiple admin password prompts. So I extended it a bit to make it more user friendly.
In a nutshell, this shell script asks you for your admin password upfront, starts up Tor, and sets all required proxy network settings automatically:
#!/usr/bin/env bash

# 'Wi-Fi' or 'Ethernet' or 'Display Ethernet'
INTERFACE=Wi-Fi

# Ask for the administrator password upfront
sudo -v

# Keep-alive: update existing `sudo` time stamp until finished
while true; do sudo -n true; sleep 60; kill -0 "$$" || exit; done 2>/dev/null &

# Let's roll
sudo networksetup -setsocksfirewallproxy $INTERFACE 127.0.0.1 9050 off
sudo networksetup -setsocksfirewallproxystate $INTERFACE on
tor
sudo networksetup -setsocksfirewallproxystate $INTERFACE off
Save this script under something like tor.sh in one of your sourced bin folders and use it as a replacement for the general tor command. So you can just run
tor.sh
and Tor should run smoothly on your system without additional configuration:

Verify you’re indeed browsing over the Tor network by going to check.torproject.org.
If you’re done, just exit the script with ctrl + c and the network settings will be reverted to their previous configuration.