Control Network Traffic with iptables

Packet filtering using network rules such as NAT (network address translation) can be accomplished by using iptables. Iptables utilize ports and protocols and may also be used as a firewall.
Using iptables for IPv4
By default, the iptables tool is included with your Linode supplied distribution. In order to use iptables, you will have to have root privileges to make changes. The location of the iptables files is in the /sbin directory. However, you will make changes to these files by invoking commands, not with a text editor.
The iptables Command
There are a number of options that can be used with iptables. Before you begin, you need to understand how iptables work. As stated above, iptables are used to set the rules governing network traffic. You can define different tables to handle these rules. The table contains a variety of built-in chains, but you can add your own chains. A chain is a list of rules that match a set of packets.
Basic iptables Parameters
In order to start using iptables, you will need to understand some basics about the command syntax. For example:
iptables -I INPUT -s 12.34.56.78 -j DROP
In the sample above you are invoking iptables by its name. The -I option is for insertion. Using a rule with the insertion option will add it at the beginning of a chain, it will also be the rule that is applied first. You may also use a number with -I option to indicate its placement in the chain. The -s parameter along with the IP address (12.34.56.78) indicates the source. Finally the -j parameter is for jump. It specifies the target of the rule i.e. what action it is to perform if the packet is a match.
For example, the rule above is added to the beginning of the chain, and it will drop all packets from the address 12.34.56.78 received from anywhere.
| Parameter | Description |
|---|---|
-p, -- protocol | The rule, such as TCP, UDP, etc. |
-s, -- source | Can be an address, network name, hostname, etc. |
-d, -- destination | An address, hostname, network name, etc. |
-j, -- jump | Specifies the target of the rule; i.e. what to do if the packet matches. |
-g, --goto chain | Specifies that the processing will continue in a user specified chain. |
-i, --in-interface | Names the interface from where packets are received. |
-o, --out-interface | Name of the interface by which a packet is being sent. |
-f, --fragment | The rule will only be applied to the second and further fragments of fragmented packets. |
-c, --set-counters | Enables the admin to initialize the packet and byte counters of a rule. |
Default Tables
A root or sudo user can create tables. Tables are comprised of built-in chains and may also contain user-defined chains. The built-in tables present will depend on the kernel configuration and the installed modules. Below is a list of the tables available.
The default tables are as follows:
Filter– this is the default table. Its built-in chains are:- Input – is for packets going to local sockets
- Forward – is for packets routed through the server
- Output – is for locally-generated packets
Nat– when a packet creates a new connection this is the table that is used. Its built-in chains are Prerouting, Output, and Postrouting- Prerouting is for packets when they come in
- Output is for locally-generated packets before routing takes place
- Postrouting is for altering packets on the way out
Mangle– is used for special altering of packets. Its chains are Pre/Post routing, Forward, Input, and Output- Prerouting is for incoming packets
- Postrouting is for packets going out
- Output is for locally generated packets that are being altered.
- Input is for packets coming directly into the server
- Forward is for packets being routed through the server
Raw– is used primarily for configuring exemptions from connection tracking. The built-in chains are Prerouting and Output.- Prerouting is for packets that arrive by the network interface
- Output is for processes that are locally generated
Security– is used for Mandatory Access Control (MAC) rules. After the filter table, the security table is accessed next. The built-in chains are Input, Output, and Forward.- Input pertains to packets entering the server
- Output is for locally-generated packets
- Forward is for packet passing through the server
Basic iptables Options
There are a number of options that may be used with the iptables command. They are listed below:
| Option | Description |
|---|---|
-A --append | Will add one or more rules to the end of the selected chain. |
-C --check | Checks for a rule matching the specifications in the selected chain. |
-D --delete | Deletes one or more rules from the selected chain. |
-F --flush | The option is the equivalent to deleting all the rules one-by-one. |
-I --insert | Inserts one or more rules in the selected chain as the given rule number. |
-L --list | Displays are the rules in the selected chain |
-n --numeric | Will display the IP address and post number in numeric format. By default it tries to display the hostname, etc. |
-N --new-chain <name> | Creates a new user defined chain. |
-v --verbose | Provides more information when used with the list option. |
-X --delete-chain <name> | Deletes the user-defined chain specified. |
Configuring iptables
Iptables can be configured and used in a variety of ways. The following sections will outline how to configure rules by port and IP, as well as blacklisting/whitelisting addresses.
Blocking Traffic by Port
You may use a port to block all traffic coming in on a specific interface. For example:
iptables -A INPUT -j DROP -p tcp --destination-port 110 -i eth0
This rule breaks down as follows:
-Aoption will add or append the rule to the end of the chain.INPUTwill add the rule to the table.DROPmeans the packets are discarded.-p tcpmeans the rule will only drop TCP packets.--destination-port 110option filters packets targeted to port 110.-i eth0means this rule will impact only packets arriving on the ‘‘eth0’’ interface.
It is important to understand that iptables do not recognize aliases on the network interface. Therefore, if you have several virtual IP interfaces, you will have to specify the destination address to filter the traffic. A sample command is provided below:
iptables -A INPUT -j DROP -p tcp --destination-port 110 -i eth0 -d 12.34.56.78
You may also use -D or --delete to remove rules. For example:
iptables --delete INPUT -j DROP -p tcp --destination-port 110 -i eth0 -d 12.34.56.78
iptables -D INPUT -j DROP -p tcp --destination-port 110 -i eth0 -d 12.34.56.78
Drop Traffic from an IP
As described in the previous section, in order to drop all incoming traffic from a specific IP address, use the iptables command with the following options:
iptables -I INPUT -s 12.34.56.87 -j DROP
To remove these rules, add --delete or -D to the command as in the following examples:
iptables --delete INPUT -s 12.34.56.87 -j DROP
iptables -D INPUT -s 12.34.56.87 -j DROP
Block/Allow Traffic by Port Number
One method of creating a firewall is by blocking all traffic to the system and then allowing traffic on certain ports. Below are sample commands to illustrate the process:
iptables -A INPUT -m state --state ESTABLISHED,RELATED -j ACCEPT
iptables -A INPUT -i lo -m comment --comment "Allow loopback connections" -j ACCEPT
iptables -A INPUT -p icmp -m comment --comment "Allow Ping to work as expected" -j ACCEPT
iptables -A INPUT -p tcp -m multiport --destination-ports 22,25,53,80,443,465,5222,5269,5280,8999:9003 -j ACCEPT
iptables -A INPUT -p udp -m multiport --destination-ports 53 -j ACCEPT iptables -P INPUT DROP
iptables -P FORWARD DROP
Now to breakdown the example above, the first two commands add or append rules to the INPUT chain in order to allow access on specific ports. The -p tcp and -p udp options specify either UDP or TCP packet types. The -m multiport function matches packets on the basis of their source or destination ports, and can accept the specification of up to 15 ports. Multiport also accepts ranges such as 8999:9003 which count as 2 of the 15 possible ports, but match ports 8999, 9000, 9001, 9002, and 9003. The next command allows all incoming and outgoing packets that are associated with existing connections so that they will not be inadvertently blocked by the firewall. The final two use the -P option to describe the default policy for these chains. As a result, all packets processed by INPUT and FORWARD will be dropped by default.
Note that the rules described above only control incoming packets, and do not limit outgoing connections.
Whitelist/Blacklist Traffic by Address
You can use iptables to block all traffic and then only allow traffic from certain IP addresses. These firewall rules are useful for limiting access to specific resources at the network layer. Below is an example:
iptables -A INPUT -m state --state ESTABLISHED,RELATED -j ACCEPT
iptables -A INPUT -i lo -m comment --comment "Allow loopback connections" -j ACCEPT
iptables -A INPUT -p icmp -m comment --comment "Allow Ping to work as expected" -j ACCEPT
iptables -A INPUT -s 192.168.1.0/24 -j ACCEPT
iptables -A INPUT -s 12.34.56.78 -j ACCEPT
iptables -P INPUT DROP
iptables -P FORWARD DROP
In the first command, the -s 192.168.1.0/24 statement specifies that all source IPs (-s) in the address space of 192.168.1 are allowed. You may specify a range of IP address using CIDR (Classless Inter-Domain Routing) notation, or individual IP addresses as in the second command. The third command allows all incoming and outgoing packets that are associated with existing connections. The final two commands set the default policy for all INPUT and FORWARD chains to drop all packets.
Using iptables for IPv6
When working with IPv6, it is important to remember that the iptables command is not compatible. However, there is an ip6tables command that is expressly for working with IPv6. The options such as append, check, etc. are the same as with iptables. The tables used by ip6tables are raw, security, mangle and filter. The parameters such as protocol, source, etc. are the same. The syntax is essentially the same as IPv4. Sample syntax is below:
ip6tables [-t table] -N chain
To view what rules are configured for IPv6 use the command:
ip6tables -L
Configuring Rules for IPv6
Again ip6tables works by using ports, specific addresses for blacklisting, protocols and so forth. The main exception is that ip6tables can use extended packet matching modules with the -m or match options, followed by the module name. Below are some of the extended modules:
- addrtype – matches packets based on their address type. Some of the address types are: > : – Local > – Unicast > – Broadcast > – Multicast >
- ah – matches the parameters in the authentication header of IPsec packets.
- cluster – you can deploy gateway and back-end load-sharing clusters without a load-balancer.
- comment – allows you to add a comment to any rule.
- connbytes – matches by how many bytes or packets a connection has transferred, or average bytes per packet.
There are several modules not listed here. You may review the list of extended modules by using the man page:
man ip6tables
Below is a sample rule used in ip6tables:
# limit the number of parallel HTTP requests to 16 for the link local network
ip6tables -A INPUT -p tcp --syn --dport 80 -s fe80::/64 -m connlimit --connlimit-above 16 --connlimit-mask 64 -j REJECT
ip6tables -A INPUT -p tcp -m tcp --dport 22 -j ACCEPT
This rule breaks down as follows:
- The first line is a comment.
-Ais for append.INPUTis to add the rule to the table.-pis for protocol which is TCP.--synonly matches TCP packets with the SYN bit set and the ACK, RST, and FIN bits cleared.--dportis the destination port, which is 80.-sis the source, which is the local address range fe80::/64.-mis for match.connlimitis the extended packet module name, which is connection limit.--connlimit-above 16means the number of connections is above 16 only the 16 will be used.--connlimit-mask 64it is the group hosts using a prefix length of 64.-jis for jump, it tells the target of the rule what to do if the packet is a match.REJECTmeans the packet is dropped.
Required Rules for Non-Static IPv6 Allocations
# Below are the rules which are required for your IPv6 address to be properly allocated
ip6tables -A INPUT -p icmpv6 --icmpv6-type router-advertisement -m hl --hl-eq 255 -j ACCEPT
ip6tables -A INPUT -p icmpv6 --icmpv6-type neighbor-solicitation -m hl --hl-eq 255 -j ACCEPT
ip6tables -A INPUT -p icmpv6 --icmpv6-type neighbor-advertisement -m hl --hl-eq 255 -j ACCEPT
ip6tables -A INPUT -p icmpv6 --icmpv6-type redirect -m hl --hl-eq 255 -j ACCEPT
Saving Rules for iptables and ip6tables
Changes made with the iptables and ip6tables commands are temporary so any rulesets you create will disappear upon reboot. To prevent this from happening, see our Securing Your Server guide for instructions on how to save iptables and ip6tables rules for your Linux distribution.
Now your rules are saved and should be available on your next reboot.
Introduction to iptables-persistent
Debian and Ubuntu have an extra package which makes working with iptables even easier. This package will save changes that have been made to your IP rules so the will become persistent. However, you may need to install this package. After installation, there will be two files created which will allow you to edit and save all your rules in one of these files. The first file is for the rules governing IPv4, and the second is for rules pertaining to IPv6.
Installing iptables-persistent
On a Debian or Ubuntu use the command:
ls /etc/iptables
If you receive the message “No such file or directory,” you will need to install the iptables persistent package. Use the command:
apt-get install iptables-persistent
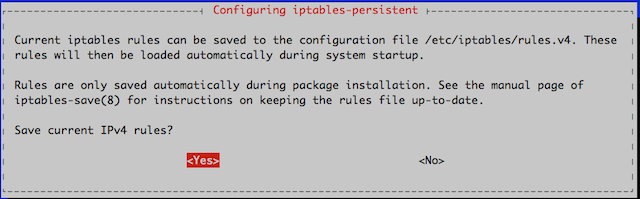
During the installation, you will be prompted twice. The first prompt is asking if you would like to save your current IPv4 rules.
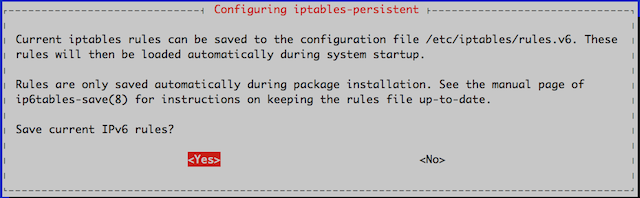
The second prompt is to save the rules configured for IPv6.
After the install is complete, you should see the iptables’ subdirectory. Run the ls /etc/iptables command again to verify.:
user@titan:~# ls /etc/iptables
rules.v4  rules.v6
Using iptables-persistent
To view what rules are already configured on your server run the following command:
iptables -L
You should see similar output:
root@titan:~# iptables -L
Chain INPUT (policy ACCEPT)
target      prot opt source         destination
DROP        all  --  12.36.56.78    anywhere

Chain FORWARD (policy ACCEPT)
target      prot opt source         destination

CHAIN OUTPUT (policy ACCEPT)
target      prot opt source         destination
The rules above allow access to anyone, from anywhere to everything. Therefore, you will want to set rules to prevent unauthorized access.
iptables-persistent Rules
Use the rules.v4 or rules.v6 files to add, delete, or edit the rules for your server. These files can be edited using your favorite text editor to function as a proxy, NAT, or firewall. The configuration is dependent on the requirements of your server and what functions are needed. Below is a file except from both the v4 and v6 files:
/etc/iptables/rules.v4

# Generated by iptables-save v1.4.14 on Wed Apr  2 13:24:27 2014
*security
:INPUT ACCEPT [18483:1240117]
:FORWARD ACCEPT [0:0]
:OUTPUT ACCEPT [17288:2887358]
COMMIT

/etc/iptables/rules.v6

# Generated by ip6tables-save v1.4.14 on Wed Apr  2 13:24:27 2014
*nat

:PREROUTING ACCEPT [0:0]
:INPUT ACCEPT [0:0]
:OUTPUT ACCEPT [27:2576]
:POSTROUTING ACCEPT [27:2576]
COMMIT
There are existing rules configured in these files. However, either file can be edited at any time. The syntax for altering table rules is the same as in the sections “Configuring iptables” and “Configuring Rules for IPv6”.
Saving iptables-persistent Rules
By default, iptables-persistent rules save on reboot for IPv4 only. Therefore, if you are running both IPv4 and IPv6 side-by-side you will need to manually edit both the rules.v4 and rules.v6 files. Do not use the iptables-save > /etc/iptables/rules.v4 or iptables-save > /etc/iptables/rules.v6 commands as any IPv6 changes will be overwritten by the IPv4 rules. To test if your syntax is correct use the command:
service iptables-persistent restart
If the rules are correct, the service will restart with a OK message. If the syntax is wrong, you will see a FAILED message. After your service restarts with a OK message, reboot your server. The new rules should still appear in the v4 or v6 files. To verify the rules are applied and available after the restart use the commands:
iptables -L
or
ip6tables -L
Network Lock-out
When applying network rules, especially with two different IP versions and multiple interfaces, it is easy to lock yourself out. In the event you apply the rule and are now unable to access your server, you may gain access through the Linode Manager. The following steps will guide you through using the GUI interface of your Linode to gain access to your server.
- Connect to your Linode Manager.
- Click on the Remote Access tab.
- Under the section entitled “Console Access,” click on the Launch Lish Ajax Console link.
- Login with your root or sudo user name and password.
- Now remove any rules causing the connectivity issues.
- Log out of the Lish window
- Now try logging in via a regular SSH session.
This Lish console will function similarly to a regular SSH terminal session.
More Information
You may wish to consult the following resources for additional information on this topic. While these are provided in the hope that they will be useful, please note that we cannot vouch for the accuracy or timeliness of externally hosted materials.
- Security Basics
- Using the Linode Shell (Lish)
- Save iptables permanently on Ubuntu
- iptables: Linux firewall rules for a basic Web Server
- Linux Firewalls with iptables
Source: linode.com