How to mount ext2/ext3 Linux Volumes in Mac OS X (Snow Leopard) with Read/Write access

Source: The WireFrame
I was actually surprised to find out that there is no native support for popular ext2/ext3 Linux Volumes in mac OS X. So if you are like me and have ext2/ext3 drives lying around and want to access them using OS X then here is a compact guide to sort things out in Snow Leopard.
1. Install MacFUSE
If you haven’t already installed it download and install MacFUSE from http://code.google.com/p/macfuse/downloads/list.
2. Install FUSE – Ext2
Once you have MacFUSE download and install fuse-ext2 from http://sourceforge.net/projects/fuse-ext2/. Even though it says fuse-ext2, this one package gives both ext2 and ext3 read-write support.
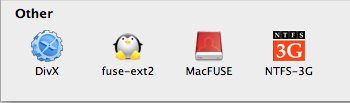
After installation you should see both MacFUSE and fuse-ext2 icons in System Preferences.
That’s it. You now have support for ext2 and ext3 file systems. When you plug in an external ext2/ext3 partition it should automatically show up in Finder, mounted and ready to use. You can also use the following commands if you prefer the shell.
$ fuse-ext2 <device|image> <mountpoint> [-o option[,...]]
 $ mount -t fuse-ext2 <device|image> <mountpoint>
Note: If auto-mount is not giving you read/write access to ext2/ext3 partitions then you will have to edit the auto-mount script for fuse-ext2 which can be found at /System/Library/Filesystems/fuse-ext2.fs/fuse-ext2.util.
$ sudo nano -c /System/Library/Filesystems/fuse-ext2.fs/fuse-ext2.utilAround line 207 (in function Mount ()) you will find the line OPTIONS="auto_xattr,defer_permissions". Change that line to read asOPTIONS="auto_xattr,defer_permissions,rw+".
...
 function Mount ()
 {
 LogDebug "[Mount] Entering function Mount..."
 # Setting both defer_auth and defer_permissions. The option was renamed
 # starting with MacFUSE 1.0.0, and there seems to be no backward
 # compatibility on the options.
 # OPTIONS="auto_xattr,defer_permissions"
 OPTIONS="auto_xattr,defer_permissions,rw+"
# The local option is only enabled on Leopard. It causes strange…