Rsync is a great tool to replicate, sync some data on your computer. And I’m heavily relying on it to backup my server and to mirror some opensource projects and GNU/Linux Distributions.
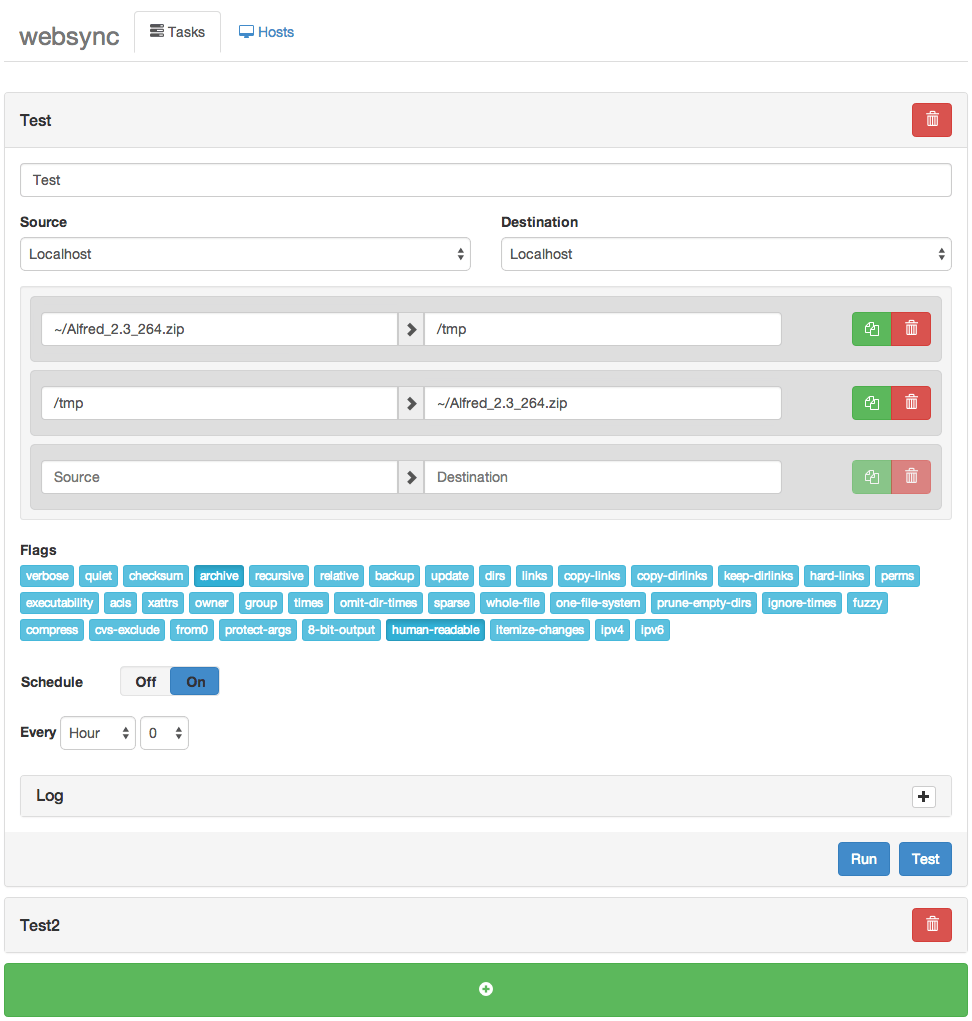
But I’ve recently found a Web interface to manage all my rsync tasks called websync.
Websync is a web based rsync task manager where you can add, edit, clone, remove, scheduled,…. your rsync tasks while being able to have a remote host as source or destination of the task (With SSH RSA key too)
Under the free license MIT, Websync has been developped by Sander Struijk and is still actively being maintained, as you can see on github forum. But it is still an early project, so if you face any issue, make sure to report them on the issue tracker.
Interested to give it a shot, here is how to install Websync!
rsync is used to perform the backup operation in UNIX / Linux.
rsync utility is used to synchronize the files and directories from one location to another in an effective way. Backup location could be on local server or on remote server.
Important features of rsync
Speed: First time, rsync replicates the whole content between the source and destination directories. Next time, rsync transfers only the changed blocks or bytes to the destination location, which makes the transfer really fast.
Security: rsync allows encryption of data using ssh protocol during transfer.
Less Bandwidth: rsync uses compression and decompression of data block by block at the sending and receiving end respectively. So the bandwidth used by rsync will be always less compared to other file transfer protocols.
Privileges: No special privileges are required to install and execute rsync
Syntax
$ rsync options source destination
Source and destination could be either local or remote. In case of remote, specify the login name, remote server name and location. Lire la suite…
En parcourant pas mal de forums, j’ai pu remarquer que pas mal de jeunes admins ne connaissaient pas Rync.
Rsync est un petit outil de sauvegarde extrêmement puissant. Grâce à cette outil j’ai pu sauvegarder des centaines de giga-octet de données sans problèmes.
Rsync se charge en plus de garder tous les droits et attributs de vos fichiers et gère en natif SSH pour faire une sauvegarde d’une machine vers une autre. Lire la suite…
It can be helpful to configure Mac OS X to automatically mount shared network drives, this is particularly true for those of us who regularly connect to a network drive for file sharing or backups.
Setting up automatic network drive connections in OS X is a two-step process, you must mount the drive, then you add it to your automatic login items. This should work flawlessly in most versions of OS X, but we’ll cover an alternative approach that uses Automator to mount a network drive automatically on login as well.
1) Mounting the Network Drive
If you’re already familiar with mapping a network drive in Mac OS X you can skip the first part of this and go straight to System Preferences in the second section.
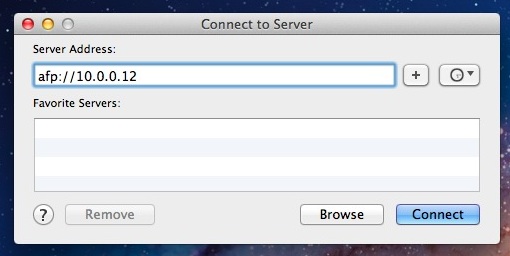
From the OS X desktop, pull down the “Go” menu and select “Connect to Server”
Connect to the server and mount the drive you want to automatically connect to on boot
Choose Guest or for a specific user check the box next to “Remember this password in my keychain” – you must select to remember the password otherwise the automatic login event can not happen without logging into the network drive
Next, you add the network drive to automatically connect on OS X by bringing it into your Login Items list.
Copy files or directories from one location to an another host by rsync.
If you’d like to set rsync automatically by cron or others, it need to configure like follows because authentication is required without settings. For example, Copy files or directories under the [/root/work] on dlp.srv.world to [/home/backup] on www.srv.world.
[1] Configure on source host.
root@dlp:~# apt-get -y install rsync
root@dlp:~# vi /etc/rsync_exclude.lst
# specify files or directories you'd like to exclude to copy
test
test.txt
[2] Configure on destination host.
root@www:~# apt-get -y install rsync
root@www:~# vi /etc/default/rsync
# line 8: change
RSYNC_ENABLE=true
root@www:~# vi /etc/rsyncd.conf
# create new
# any name you like
[backup]
# destination directory to copy
path = /home/backup
# hosts you allow to access
hosts allow = 10.0.0.30
hosts deny = *
list = true
uid = root
gid = root
read only = false
root@www:~# mkdir /home/backup
root@www:~# systemctl start rsync
[3] It’s OK. Execute rsync on Source Host like follows.
root@dlp:~# rsync -avz --delete --exclude-from=/etc/rsync_exclude.lst /root/work/ www.srv.world::backup
# Add in cron if you'd like to run reguraly
root@dlp:~# crontab -e
# for example, run at 2:00 AM in a day
00 02 * * * rsync -avz --delete --exclude-from=/etc/rsync_exclude.lst /root/work/ www.srv.world::backup
 Rsync is a great tool to replicate, sync some data on your computer. And I’m heavily relying on it to backup my server and to mirror some opensource projects and GNU/Linux Distributions.