Rsync is a great tool to replicate, sync some data on your computer. And I’m heavily relying on it to backup my server and to mirror some opensource projects and GNU/Linux Distributions.
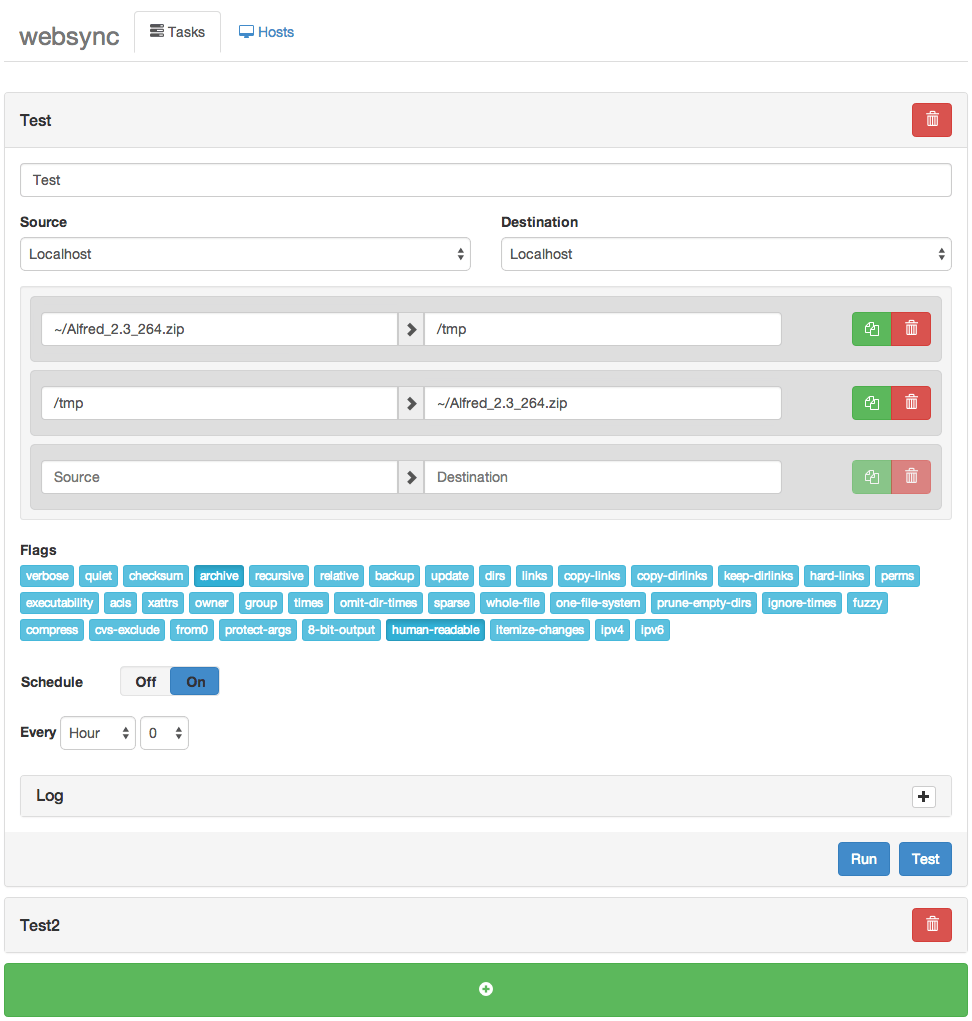
But I’ve recently found a Web interface to manage all my rsync tasks called websync.
Websync is a web based rsync task manager where you can add, edit, clone, remove, scheduled,…. your rsync tasks while being able to have a remote host as source or destination of the task (With SSH RSA key too)
Under the free license MIT, Websync has been developped by Sander Struijk and is still actively being maintained, as you can see on github forum. But it is still an early project, so if you face any issue, make sure to report them on the issue tracker.
Interested to give it a shot, here is how to install Websync!
Do you need a simple open source cross-platform command line tool that converts web pages and HTML to a PDF file? Look no further, try wkhtmltopdf.
From the project home page:
Simple shell utility to convert html to pdf using the webkit rendering engine, and qt. Searching the web, I have found several command line tools that allow you to convert a HTML-document to a PDF-document, however they all seem to use their own, and rather incomplete rendering engine, resulting in poor quality. Recently QT 4.4 was released with a WebKit widget (WebKit is the engine of Apples Safari, which is a fork of the KDE KHtml), and making a good tool became very easy.
Software features
Cross platform.
Open source.
Convert any web pages into PDF documents using webkit.
You can add headers and footers.
TOC generation.
Batch mode conversions.
Can run on Linux server with an XServer (the X11 client libs must be installed).
Can be directly used by PHP or Python via bindings to libwkhtmltox.
A note about Debian / Ubuntu Linux user
You can install wkhtmltopdf using apt-get command: $ sudo apt-get install wkhtmltopdf $ sudo ln -s /usr/bin/wkhtmltopdf /usr/local/bin/html2pdf
Sample outputs:
[sudo] password for vivek:
Reading package lists... Done
Building dependency tree
Reading state information... Done
The following NEW packages will be installed:
  wkhtmltopdf
0 upgraded, 1 newly installed, 0 to remove and 10 not upgraded.
Need to get 116 kB of archives.
After this operation, 303 kB of additional disk space will be used.
Get:1 http://debian.osuosl.org/debian/ squeeze/main wkhtmltopdf amd64 0.9.9-1 [116 kB]
Fetched 116 kB in 2s (49.4 kB/s)
Selecting previously deselected package wkhtmltopdf.
(Reading database ... 274164 files and directories currently installed.)
Unpacking wkhtmltopdf (from .../wkhtmltopdf_0.9.9-1_amd64.deb) ...
Processing triggers for man-db ...
Setting up wkhtmltopdf (0.9.9-1) ...
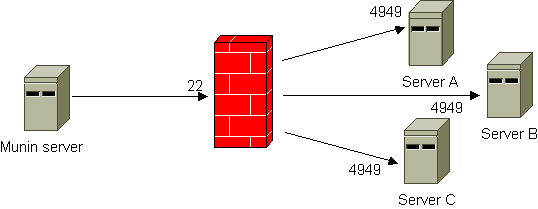
Source: munin-monitoring.org There are a number of situations where you’d like to run munin-node on hosts not directly available to the Munin server. This article describes a few scenarios and different alternatives to set up monitoring. Monitoring hosts behind a non-routing server.
In this scenario, a *nix server sits between the Munin server and one or more Munin nodes. The server in-between reaches both the Munin server and the Munin node, but the Munin server does not reach the Munin node or vice versa.
To enable for Munin monitoring, there are several approaches, but mainly either using SSH tunneling or “bouncing” via the in-between server.
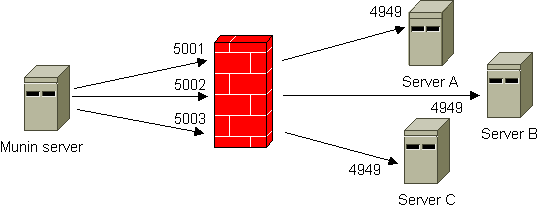
SSH tunneling
The illustration below shows the principle. By using SSH tunneling only one SSH connection is required, even if you need to reach several hosts on “the other side”. The Munin server listens to different ports on the localhost interface. A configuration example is included. Note that there is also a FAQ entry on using SSH that contains very useful information.
Bouncing
This workaround uses netcat and inetd/xinetd to forward the queries from the Munin server. All incoming connections to defined ports are automatically forwarded to the Munin node using netcat.
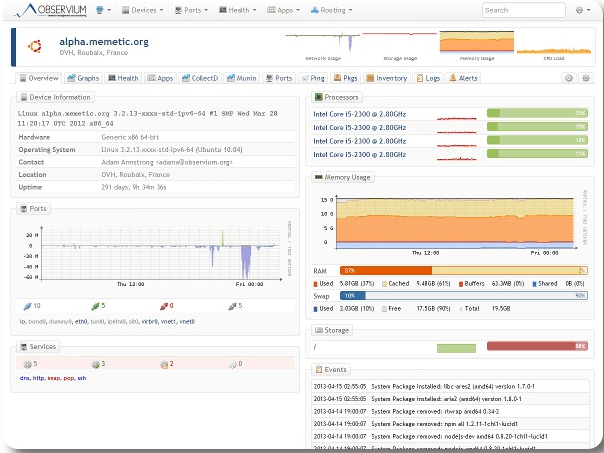
You have a problem while monitoring your servers, switches or physical machines. Observium fits your need. As a free monitoring system, it helps you to monitor your servers remotely. It is an auto-discovering SNMP based network monitoring platform written in PHP which includes support for a wide range of network hardware and operating systems including Cisco, Windows, Linux, HP, NetApp and many other. I will give you the steps to follow while setting up an Observium server on Ubuntu 12.04.
Currently there are two different versions of observium.
The observium Community is a free tool and licensed under the QPL Open Source license. This version is the best solution for small deployments. It gets security updates each 6 months.
While the second version, the Observium Professional is distributed under SVN based release mechanism. And it gets daily security updates. This tool is the best for Service Provider and enterprises deployments.
 Rsync is a great tool to replicate, sync some data on your computer. And I’m heavily relying on it to backup my server and to mirror some opensource projects and GNU/Linux Distributions.